Build Excel, Word, PowerPoint add-in
for Office 2024 - 2007 in Delphi
|
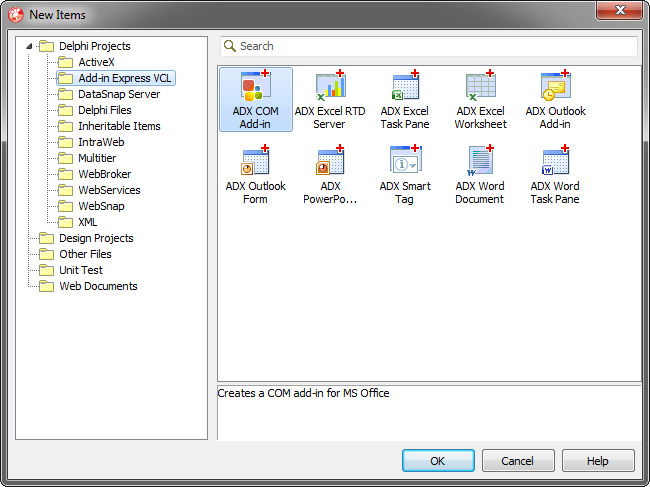
Add-in Express™ Add-in Express Home > Add-in Express for Office and Delphi VCL > Online Guide > Creating Office Developing Office COM add-in in DelphiThis page highlights almost every aspect of creating COM add-ins for Microsoft Office 2024 - 2000 applications, namely adding a custom button to Office commandbar, customizing the Ribbon interface, creating task panes, handling host application events and more. The sample project described below implements a COM add-in for Excel, Word and PowerPoint. It is included in Add-in Express for Office and VCL sample projects available on the Downloads page. Add-in Express provides additional components for Outlook COM Add-ins. See Building Outlook plug-ins. Step 1. Creating a COM Add-in projectMake sure that you have administrative permissions and run Delphi via the Run as Administrator command. Add-in Express adds the COM Add-in project template to the New Items dialog.
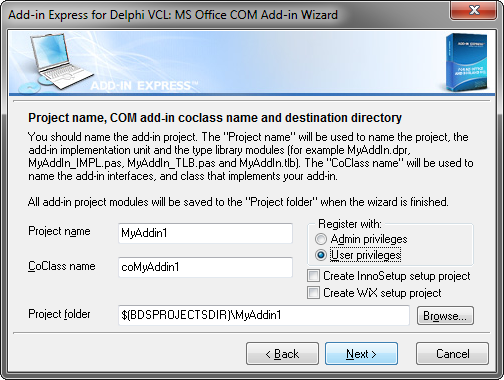
When you select the template and click OK, the COM Add-in Wizard starts. In the wizard windows, you choose the project options.
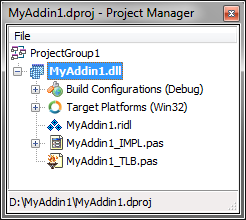
The wizard creates and opens your project in the Delphi IDE.
The COM add-in project includes the following items:
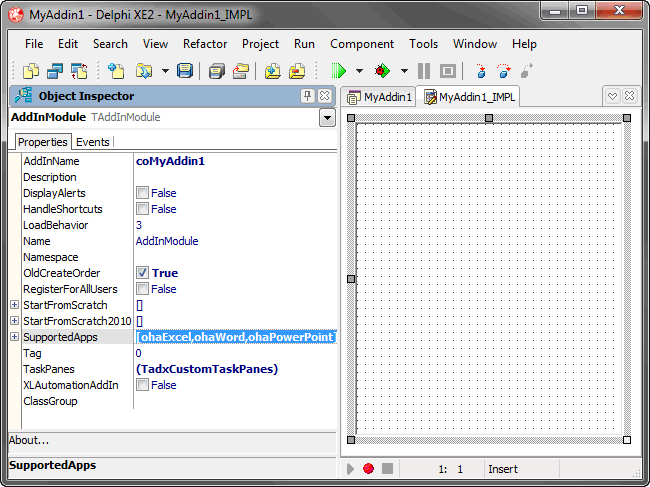
Step 2. COM Add-in moduleThe add-in module (MyAddin1_IMPL.pas and MyAddin1_IMPL.dfm) is the core component of the COM add-in project. It is a container for Add-in Express components. You specify the add-in properties in the module's properties, add the required components to the module's designer, and write the functional code of your add-in in this module. The code for MyAddin1_IMPL.pas is as follows: The add-in module contains two classes: the "interfaced" class (TcoMyAddin1 in this case) and the add-in module class (TAddInModule). The "interfaced" class is a descendant of the TadxAddIn class that implements the IDTExtensibility2 interface required by the COM Add-in architecture. Usually, you don't need to change anything in the TadxAddIn class. The add-in module class implements the add-in functionality. It is an analogue of the Data Module, but unlike the Data Module, the add-in module allows you to set all properties of your Office add-in, handle its events, and create toolbars and controls. Step 3. COM Add-in designerThe COM Add-in module allows setting add-in properties and adding components to the module. Click the module's designer surface, activate Object Inspector, choose the SupportedApps property and select Excel, Word, and PowerPoint.
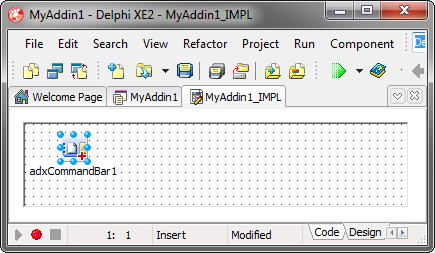
You can find the Add-in Express components in the Tool Palette. See also Add-in Express for Office and Delphi components. Step 4. Adding a new command barTo add a command bar to your Office add-in, find the TadxCommandBar component in the Tool Palette and drag-n-drop it onto the TadxCOMAddinModule designer.
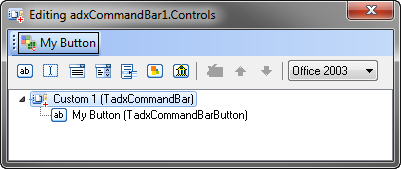
Select the command bar component and, in the Object Inspector window, specify the command bar name using the CommandBarName property. Also, you select its position in the Position property. Note. To display a command bar on the ribbon, you must explicitly set the UseForRibbon property of the command bar component to True. The controls added to such a command bar will be shown on the built-in Ribbon tab called Add-ins. Step 5. Adding a new command bar buttonTo add a new button to a command bar, in the Object Inspector window, you run the property editor of the Controls property for an appropriate command bar component. The property editor is a simple and easy designer of command bars and their controls.
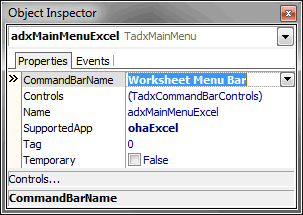
Specify the button's Caption property and set the Style property to adxMsoButtonIconAndCaption (default value = adxMsoButtonAutomatic). In the Object Inspector window, you switch to the Events tab to add the OnClick event handler for the command bar button component. Step 6. Accessing host application objectsThe Add-in Module provides the HostApplication property that returns the Application object (of the OleVariant type) of the host application the add-in is currently running in. For your convenience, Add-in Express provides the <HostName>App properties, say ExcelApp of the TExcelApplication type and WordApp of the TWordApplication type. Together with the HostType property, this allows us to write the following code to the Click event of newly added button. Step 7. Customizing main menus of Excel, Word, PowerPointAdd-in Express provides a component to customize main menus in Office applications (but see Developing Microsoft Outlook COM add-in for customizing Outlook menu bar). Some applications from Office 2000 - 2003 have several main menus. Say, in these Excel versions, you find Worksheet Menu Bar and Chart Menu Bar. Naturally, in Excel 2007 - 2024 these menus are replaced with the Ribbon UI. Nevertheless, they are still accessible programmatically and you may want to use this fact in your code. In this sample, we are going to customize the File menu in Excel and Word version 2000 - 2003. You start with adding two main menu components (TadxMainMenu) and specifying correct host applications in their SupportedApp properties. Then, in the CommandBarName property, you specify the main menu. The screenshot below shows how you set up the main menu component in order to customize the Worksheet Menu Bar main menu in Excel.
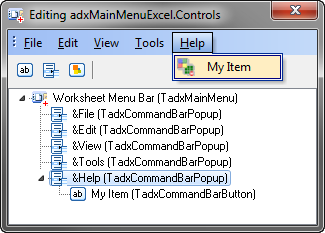
The TadxMainMenu.Controls property provides a designer that allows adding custom controls to a set of predefined popup controls that corresponds to built-in main menu items such as File, Edit, etc. Those popups demonstrate the main principle of referencing built-in command bar controls: if the OfficeID property of a commandbar control component is other than 1, you are referencing the corresponding built-in control. You can find the IDs of built-in command bar controls using the free Built-in Controls Scanner utility.
In the source code of the sample add-in described here, you can find how you can customize the Office Button menu in Office 2007 (see the component named adxRibbonOfficeMenu1). As to the Backstage View, also known as the File tab in Office 2010 - 2024, the sample projects provide the adxBackstageView1 component that implements the customization shown in Figure 3 at Introduction to the Office 2010 Backstage View for Developers. Note, if you customize the Office Button menu only, Add-in Express maps your controls to the Backstage View. If, however, both Office Button menu and File tab are customized at the same time, Add-in Express ignores custom controls you add to the Office Button menu. Step 8. Customizing context menus of Excel, Word, PowerPointAdd-in Express allows customizing commandbar-based context menus of Office 2000 - 2024 applications with the TadxContextMenu component. Its use is similar to that of the TadxMainMenu component. To set up such a component to add a custom button to an Office context menu, you do the following: :
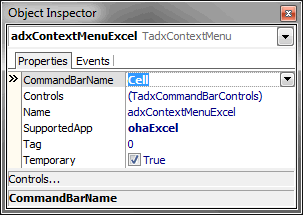
The screenshot below demonstrates adding a custom item to the context menu Cells in Excel.
You may want to use the OnBeforeAddControls event provided by the component to modify the context menu depending on the current context. Say, custom controls in the context menu may reflect the content of an Excel cell, the current chapter of the Word document, etc. There are several issues related to using command bar based context menus:
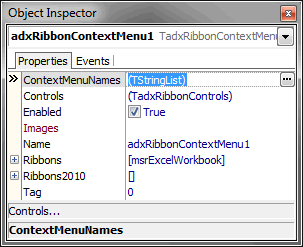
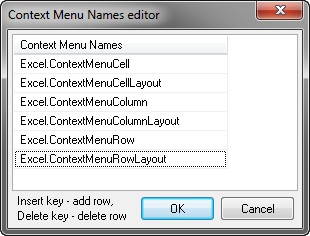
To add a custom item to a context menu in Office 2010 - 2024, you use the TadxRibbonContextMenu component. Unlike its commandbar-based counterpart (TadxContextMenu), this component allows adding the same custom controls to several context menus in the specified Ribbon. Say, the screenshots below demonstrate component settings required for adding a control to the ExcelWorkbook Ribbon. To specify the context menus to which the control will be added, you use the editor of the ContexMenuNames property of the component.
Step 9. Handling host application eventsAdd-in Express supplies several components that provide application-level events for the add-in module. To handle Excel events to the add-in, drop a TadxExcelAppEvents onto the module. Naturally, handling Word events requires using a TadxWordAppEvents while TadxPowerPointAppEvents provides PowerPoint application-level events. With the above components, you can handle any application-level events of the host application. Say, you may want to disable a button when a window deactivates and enable it when a window activates. The code processing the PowerPoint version of the WindowActivate and WindowDeactivate events is as follows: Note. It is possible to create a set of event handlers and connect it to any given Excel worksheet. You can do this by adding a TExcelWorksheet (Tool Palette, the Servers tab) onto the add-in module. Step 10. Customizing the Office Ribbon user interfaceTo add a new tab to the Office ribbon, you add the TadxRibbonTab component to the module.
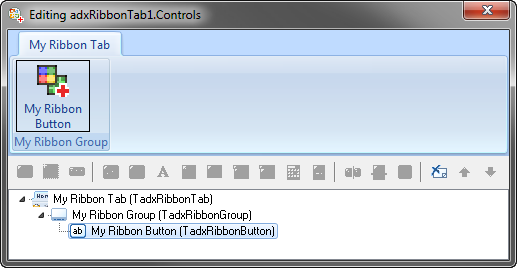
In the Object Inspector window, run the editor for the Controls collection of the tab. In the editor, use the toolbar buttons or context menu to add or delete Add-in Express components that form the Ribbon interface of your add-in. First, you add a Ribbon tab and change its caption to My Ribbon Tab. Then, you select the tab component, add a Ribbon group, and change its caption to My Ribbon Group. Next, you select the group, and add a button group. Next, you select the group, and add a button. Set the button caption to My Ribbon Button. Use the Glyph property to set the icon for the button. Now write the following code in the OnClick event handler of the newly added Ribbon button (the code below refers to the code added in Step 6. Accessing Host Application Objects): Remember, the TadxRibbonTab Controls editor performs the XML-schema validation automatically, so from time to time you will run into the situation when you cannot add a control to some Ribbon level. It is a restriction of the Ribbon XML-schema. Step 11. Adding custom task panes in ExcelTo add a new task pane to Outlook, Excel, Word and PowerPoint, you do the following:
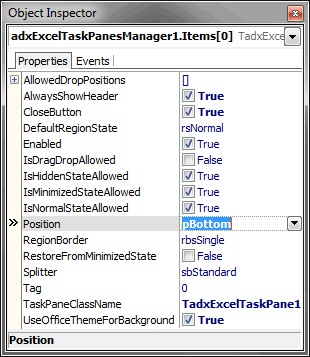
Below is the description of the settings:
Now you add a label onto your custom task pane and add an event handler for the OnADXBeforeTaskPaneShow event: See Advanced Excel Task Panes for more information. Step 12. Adding custom task panes for PowerPointTo add a PowerPoint task pane:
Now add a label onto the form, and update the label in the OnADXBeforeTaskPaneShow event handler of the form: Step 13. Adding custom task panes for WordYou add a Word task pane in the same manner:
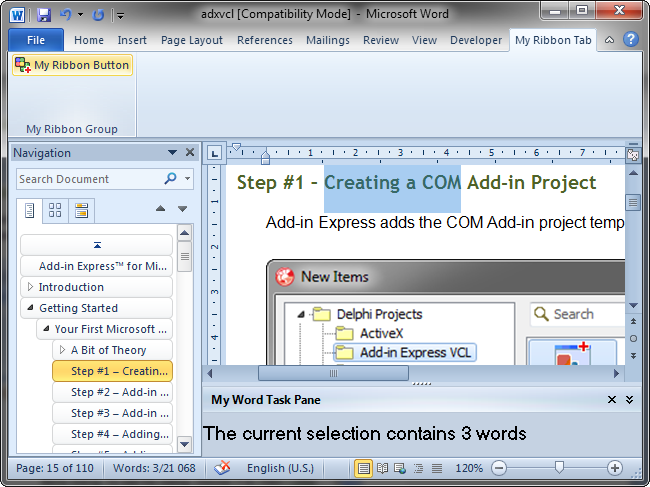
When the item's properties are set, you add a label onto the form, and write the code that updates it in the OnADXBeforeTaskPaneShow event handler of your form: Step 14. Running your Office COM add-inSave the add-in project, compile it, close all applications that you have selected as add-in host a pplications, and register the add-in via "Run | Register ActiveX Server". Run one of the selected host applications, find your toolbar and click the button. The newly created add-in in Word 2010:
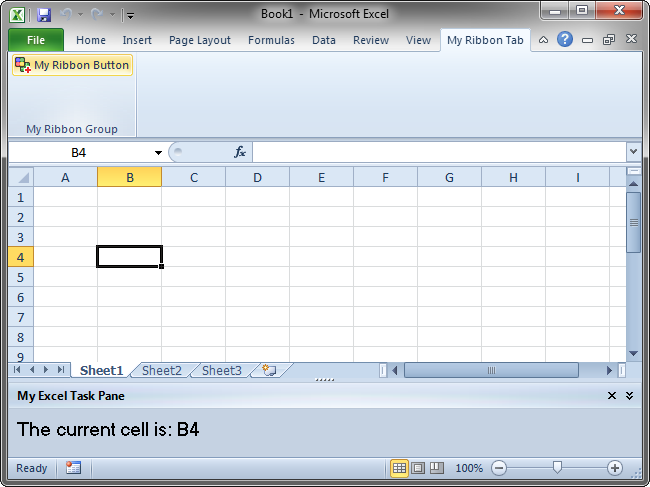
The newly created add-in in Excel 2010:
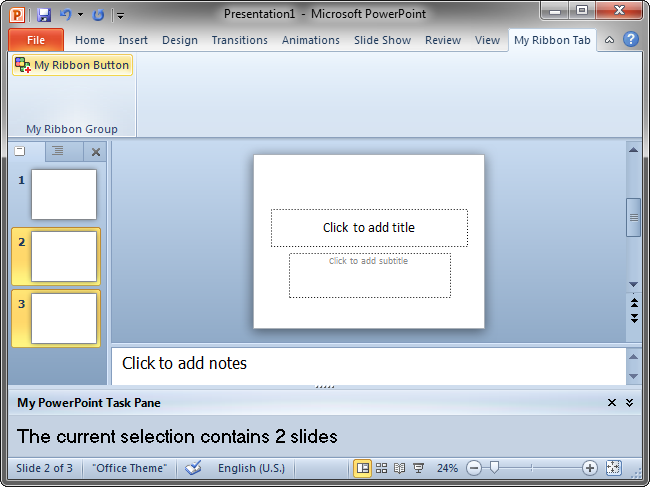
The newly created add-in in PowerPoint 2010:
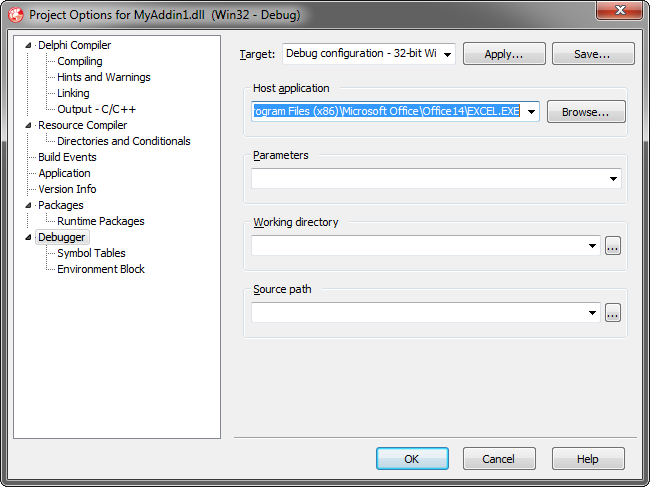
Step 15. Debugging the COM add-inTo debug your add-in, just indicate the add-in host application in the Host Application field in the Project Options window.
To debug your add-in in an Office 64-bit application, you have to register the add-in DLL using regsvr32; run it from an elevated 64-bit Command Prompt. In addition, you must explicitly specify to run the 64-bit application in the dialog window shown above. Step 16. Deploying the COM add-inMake sure your setup project registers the add-in DLL. Say, in Inno Setup projects you use the 'regserver' command. |
