How to create a smart tag for Office:
Word, Excel, Outlook and PowerPoint
|
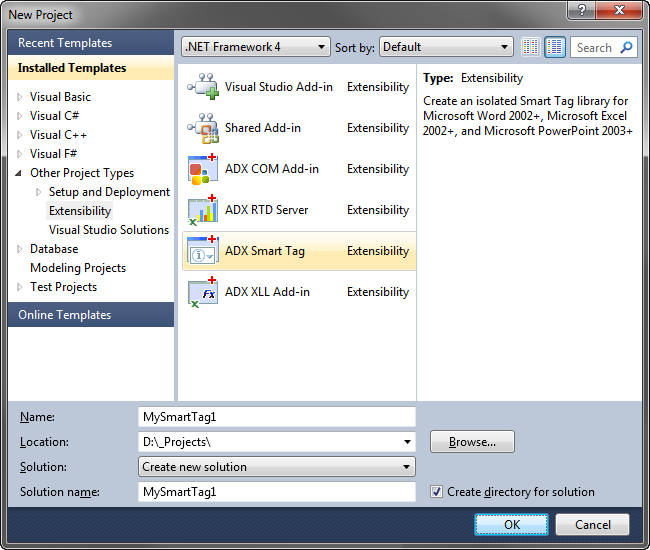
Add-in Express™ Add-in Express Home > Add-in Express for Office and .NET > Online Guide > Programming Office smart tags Creating smart tagsAdd-in Express for Office and .net allows you to create smart tags for Microsoft Excel, Word, Outlook (with Word as a default e-mail editor) and PowerPoint in Office 2002 and higher. The smart tag project below is written in VB.NET and works for Word 2002 - 2024/365. It demonstrates how you create a smart tag handling a list of fixed words and providing the words with a sample action. A bit of theorySmart Tags were introduced in Word 2002 and Excel 2002. Then they added PowerPoint 2003 to the list of smart tag host applications. In Office 2010 Microsoft declared smart tags deprecated. Although you can still use the related APIs in projects for Excel, Word, PowerPoint 2010 and above, these applications do not automatically recognize terms, and recognized terms are no longer underlined. Users must trigger recognition and view custom actions associated with text by right-clicking the text and clicking the Additional Actions on the context menu. Below is what was said about the Smart Tag technology in earlier days: This technology provides Office users with more interactivity for the content of their Office documents. A smart tag is an element of text in an Office document having custom actions associated with it. Smart tags allow recognizing such text using either a dictionary-based or a custom-processing approach. An example of such text might be an email address you type into a Word document or an Excel workbook. When smart tag recognizes the email address, it allows the user to choose one of the actions associated with the text. For email addresses, possible actions are to look up additional contact information or send a new email message to that contact. Per-user smart tagsA smart tag is a per-user thing that requires registering in HKCU. In other words, a smart tag cannot be registered for all users on the machine. Instead, it must be registered for every user separately. Step 1. Creating a smart tag library projectMake sure that you have administrative permissions before running Visual Studio. Run Visual Studio via the Run as Administrator command. In Visual Studio, open the New Project dialog and navigate to the Extensibility folder.
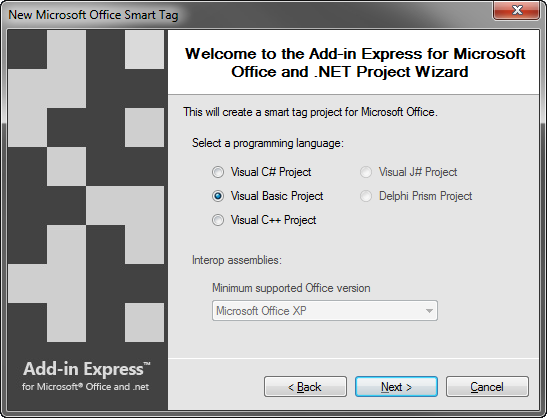
Choose Add-in Express Smart Tag and click OK. This starts the Smart tag project wizard. In the first wizard window, you choose your programming language, this can be either C#, VB.NET or C++:
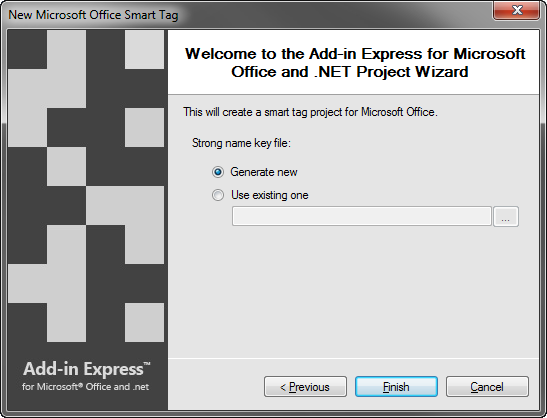
In the window below, choose Generate new or specify an existing .snk file and click Next.
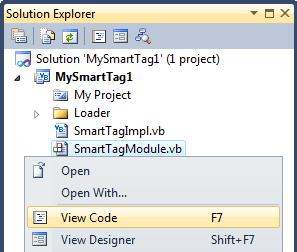
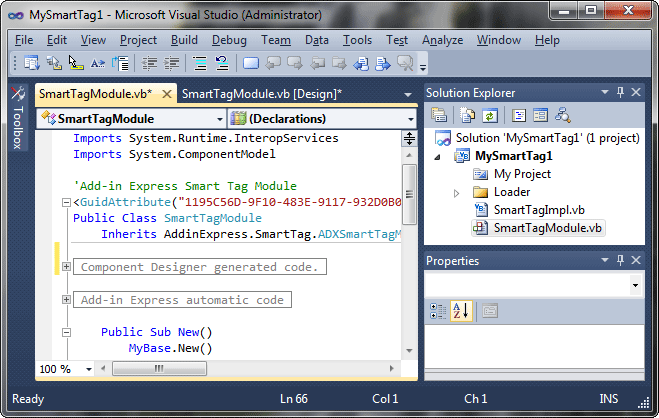
The project wizard creates and opens a new solution in Visual Studio. The solution contains an only project, the smart tag project. Note. Do not delete the SmartTagImpl.vb (SmartTagImpl.cs) file required by the Add-in Express implementation of the Smart Tag technology. Usually, you do not need to modify it. The Smart Tag project contains the SmartTagModule.vb (or SmartTagModule.cs) file described in the next step. Step 2. Smart Tag moduleSmartTagModule.vb (or SmartTagModule.cs) is a smart tag module that is the core part of the smart tag project. The module is a container for ADXSmartTag components. It contains the SmartTagModule class, a descendant of ADXSmartTagModule, which implements the COM interfaces required by the Smart Tag technology and allows managing smart tags. To review its source code, right-click the file in Solution Explorer and choose View Code in the popup menu.
In the code of the module, pay attention to the CurrentInstace property. It returns the current instance of the Smart Tag module. This is useful when, for example, you need to access a method defined in the module from the code of another class.
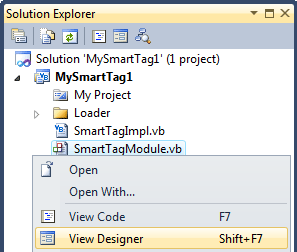
Step 3. Smart tag module designerThe module designer allows setting smart tag properties and adding Smart Tag components to the module. In Solution Explorer, right-click the SmartTagModule.vb (or SmartTagModule.cs) file and choose the View Designer popup menu item. Click the designer surface when you need to set properties of the Smart tag module in the Properties window.
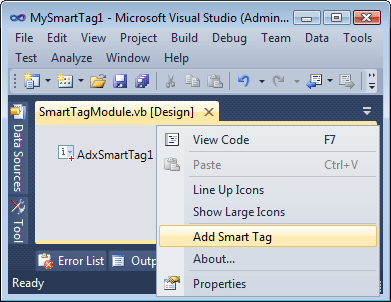
Step 4. Creating a new smart tagTo add a smart tag to your Smart tag library, you use the Add Smart Tag command (see below) that places a new ADXSmartTag component onto the module.
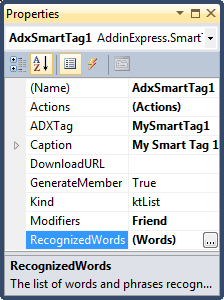
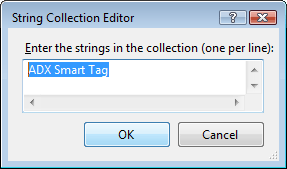
Select the newly added component and, in the Properties window, specify the caption for the added smart tag in the Caption property. The value of this property will become a caption of the smart tag context menu. Also, specify the phrase(s) recognizable by the smart tag in the RecognizedWords string collection.
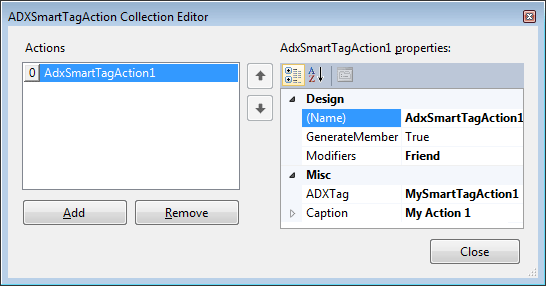
Step 5. Specifying smart tag actionsNow you add smart tag actions to the context menu of your smart tag. To specify a new smart tag action, add an item to the Actions collection and set its Caption property that will become the caption of the appropriate item in the smart tag context menu (see the screenshot below).
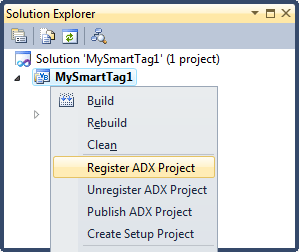
To handle the Click event of the action, close the Actions collection editor, and, in the Properties window, select the newly added action. Then add the Click event handler and write your code: Step 6. Running the smart tagChoose the Register Add-in Express Project item in the Build menu, restart Word, and enter words recognizable by your smart tag into a document. Please remember that Smart tags are declared deprecated since Office 2010. Nevertheless, you can still use the related APIs in projects for Office 2013 and higher.
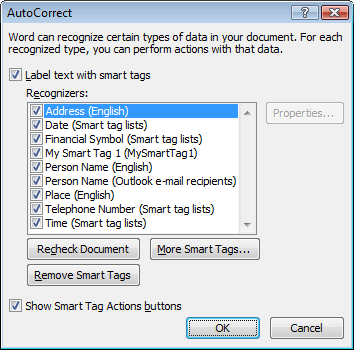
Also, you can check if your smart tag is present in the AutoCorrect dialog:
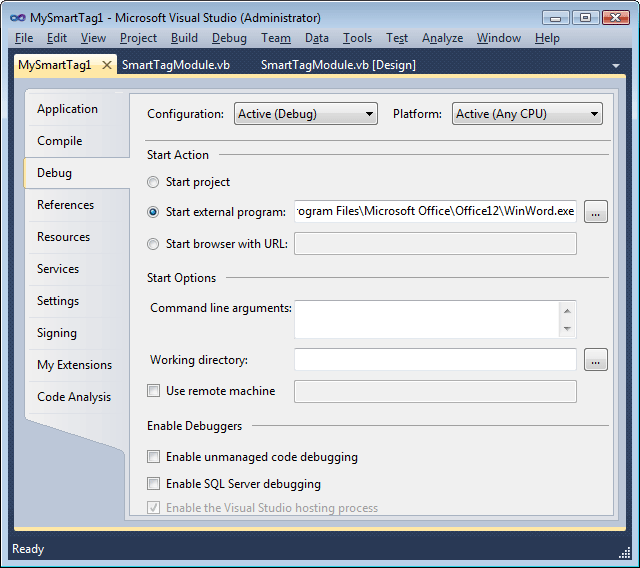
Step 7. Debugging the smart tagTo debug your Smart Tag, just specify the host application as the Start External Program in the Project Options window and press F5.
Step 8. Deploying the smart tagLinks to step-by-step instructions for deploying smart tags are given in the table below. Background information is provided in Deploying Office extensions. Table 4. Deploying Smart tags: links to step-by-step instructions
What's next?Here you can download the smart tag project described above, both VB.NET and C# versions; the download link is labeled Add-in Express for Office and .NET sample projects. You may want to check Development where we describe typical misunderstandings and provide useful tips. |
