
Redeploying Office extensions via ClickTwice
This is the final part of the series that describes all possible ways of deploying your Add-in Express-based Office extensions. I recommend that you begin from the very beginning: Step-by-step deployment of Office extensions: Overview. Or, if you are interested only in ClickTwice :) deployment, you can start right away with Deploying Office extensions via ClickTwice :).
Every Add-in Express module provides the IsMSINetworkDeployed method, which returns True if your Office extension was installed via ClickTwice. Then you can use the CheckForMSIUpdates method in your project code to check if anyupdates are available. CheckForMSIUpdates returns:
- an empty string if there are no updates in the location you specified in the Installation URL field (Step 5 of Deploying Office extensions via ClickTwice);
- a formatted string: a URL or UNC path if a new version of the Office extension is available; the URL can be a link to a setup.exe or downloader (Step 10 of Deploying Office extensions via ClickTwice);
- the web page URL that you specified in the Download page for updates field of the Preferencesdialog (Step 8 of Deploying Office extensions via ClickTwice).
You can find a code sample that checks for updates in this article: Add-in Express MSI Based Web deployment: Managing updates, part 3
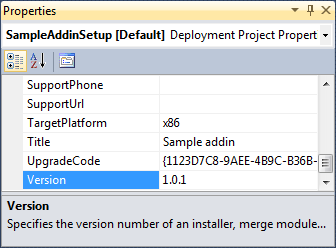
Step 1. Increase the version number
Increase the version number in the Version property of your setup project.
Step 2. Build your setup project
Just build the setup project.
Step 3. Open the Publish dialog
Select your project in the Solution Explorer window and choose Publish ADX Project in the project context menu.

In the Publish dialog, switch to the MSI-based web deployment tab.

Step 4. Browse for the new .MSI package
Specify the new .MSI file in the Installer file field. The wizard reads some general info about the .MSI and fills in the fields in the upper part of the dialog.

Step 5. Publish the new version
Go to Step 4 of Deploying Office extensions via ClickTwice to see how to publish your new version.