Create custom Outlook inspector forms in C#, VB.NET:
contacts, appointments, mail in Outlook 2007, 2003
|
Add-in Express™ Extensions Creating custom Outlook formsAll Outlook developers would agree that customizing, or modifying, forms in Microsoft Outlook has always been a bit of a challenge. If you have ever tried to create a custom Outlook Inspector form other than mail, post, or contact forms, you were limited to adding additional tab pages to the standard page. Even if you have tried to modify the contact form, you were not able to replicate the look and feel of the standard Outlook form. Moreover, once you designed your custom form, you had to use notepad to write code behind the form. The Add-in Express Extensions for Outlook gets over all these limitations and provides advanced customization for Outlook forms, including e-mail forms, contacts, appointments and tasks for Outlook 2007, Outlook 2003, 2002 (XP) and 2000. Now you can:
Below, you can see step-by-step example on how to quickly start creating custom forms for Outlook 2007, Outlook 2003, 2002 and 2000 with Advanced Form Regions provided by the Add-in Express Extensions for Outlook. Visual Studio .NET 2003, 2005 and 2008 (Visual Basic .NET, C#) are supported. Before we start, you may want to read more about:
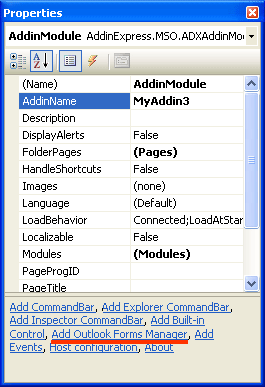
Now, let's create a custom Outlook e-mail form. 1. Adding the Outlook Forms ManagerThe Add-in Express Extensions for Outlook adds to the add-in module commands set a special command, "Add Outlook Forms Manager", available on the command area of the Properties window or by right-clicking the add-in module.
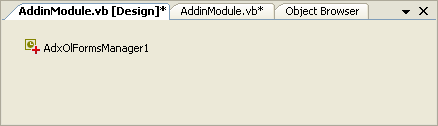
To include the Add-in Express Extensions for Outlook functionality in your Outlook add-in project, select the add-in module and run the "Add Outlook Forms Manager" command. The command adds the Outlook Forms Manager component to the add-in module.
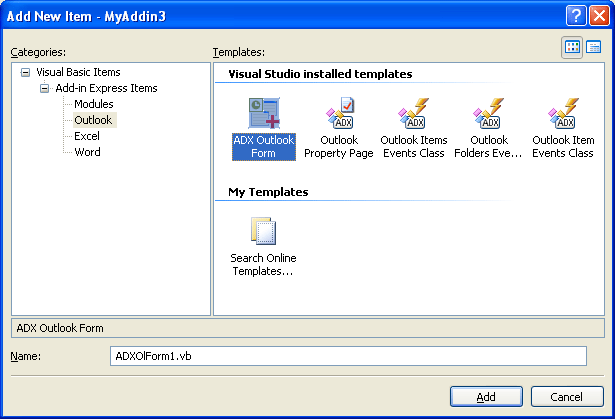
2. Creating a custom form for embedding into Outlook form regionsRun the "ADX Outlook Form" wizard from the Add New Item dialog of the add-in project. The wizard adds a new form module to the add-in project.
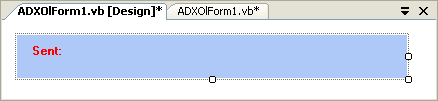
3. Customizing the Outlook formOn your custom form, you can use any .NET controls such as calendars, edit boxes, grids, list views, etc. In this example we created a custom Outlook mail form by adding a label to show when the selected message was sent.
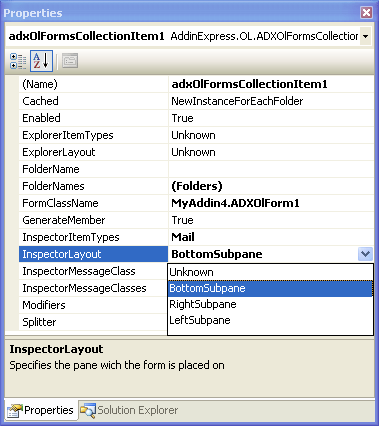
4. Accessing the Outlook objectYou access the base Outlook objects and events through the event handlers of the form instance of the ADXOlForm type. For example, you can handle the ADXBeforeShow event to initialize your form in the current Inspector window: C# VB.NET 5. Binding your custom form to Outlook form regionsTo specify the Inspector window, which the customized form is displayed for, you add a new item to the Items collection of the Outlook Forms Manager, select the form class in the FormClassName property and specify an Outlook form via three special properties, InspectorItemTypes, InspectorMessageClass and InspectorMessageClasses. Then, with the InspectorLayout property, you specify the region, which the form is placed on.
6. Run your Outlook add-inFinally, you rebuild the add-in project, run Outlook and find your custom form embedded into the Outlook form region. |