Deploying Internet Explorer add-ons: C#, VB.NET.
Create Windows Installer package.
|
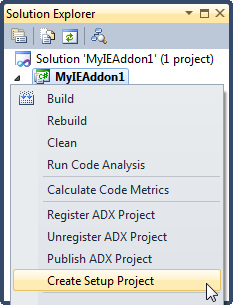
Add-in Express™ Add-in Express Home > Add-in Express for Internet Explorer > Online Guide > IE add-on deployment - Creating MSI installers Deploying Internet Explorer add-on - Creating MSI installersTo make the deployment of your IE add-ons as fast and easy as it could possibly be, Add-in Express-based Internet Explorer solutions include setup projects with all necessary prerequisites and advanced actions that you can use to customize the installation process. You create conventional Windows Installer packages (aka .MSI installers) using the Add-in Express Setup Project Wizard that generates localized setup projects. In addition, Add-in Express supports a simple technology of Web-based deployment and update of IE extensions. Creating an IE add-on installation package automaticallyTo create an installation package for Windows Installer, you start the setup project wizard via the context menu of your IE add-on project.
The wizard allows specifying all sorts of description strings as well as the location and localization of the setup project.
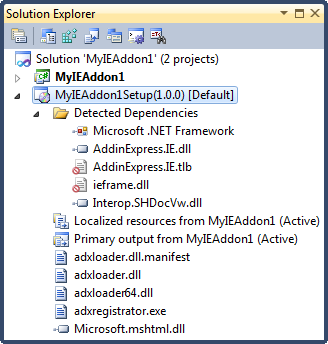
The Setup Project wizard adds the following setup project to the solution.
Let's walk through the files.
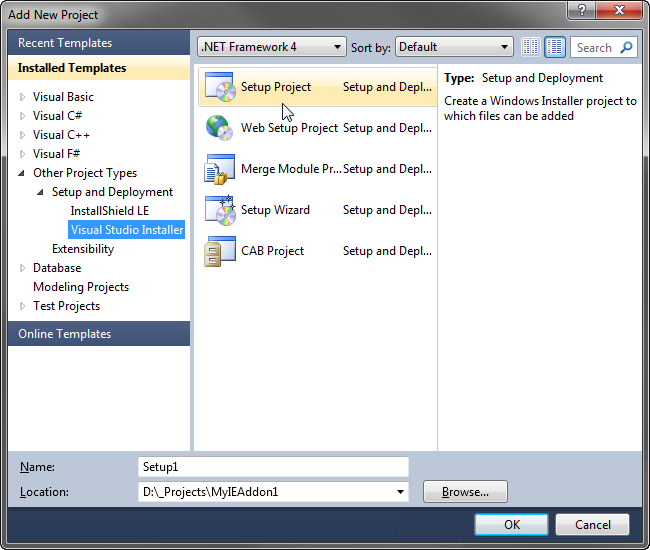
Note that ieframe.dll and AddinExpress.IE.tlb are excluded. You must exclude all .TLB and .OLB files from the setup project except for .TLBs required for the functionality of your IE extension. Creating an IE add-on setup project manuallyYou can always create a setup project with the Add-in Express project wizard when starting a new project. Nevertheless, if you need to create a setup project manually, use the following step-by-step guide. Add a new setup projectRight-click the solution item in the Solution Explorer window and choose Add | New Project.
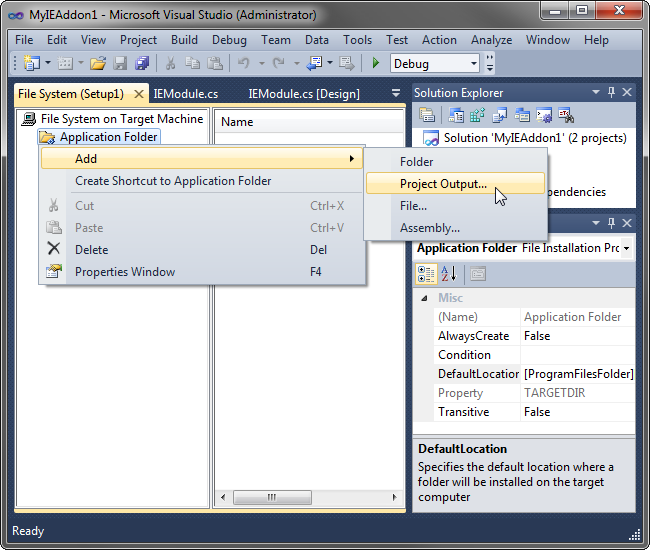
In the Add New Project dialog, select the Setup Project item and click OK. This adds a new setup project to your solution. File System editorRight-click the newly added setup project item and choose View | File System in the context menu. Primary output of an IE add-onRight-click the Application Folder item and choose Add | Project Output
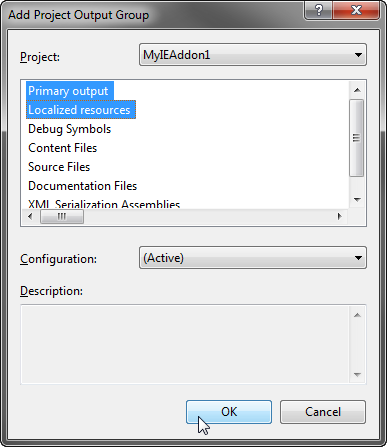
In the Add Project Output Group dialog, select the Primary output and Localized resources items of your IE add-on project and click OK.
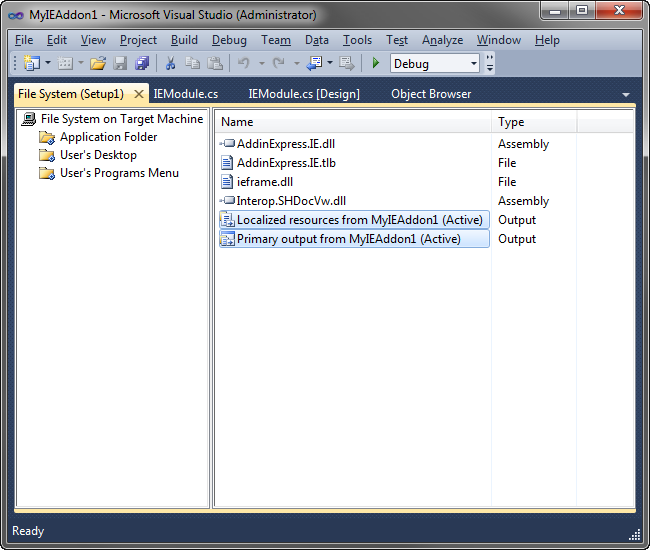
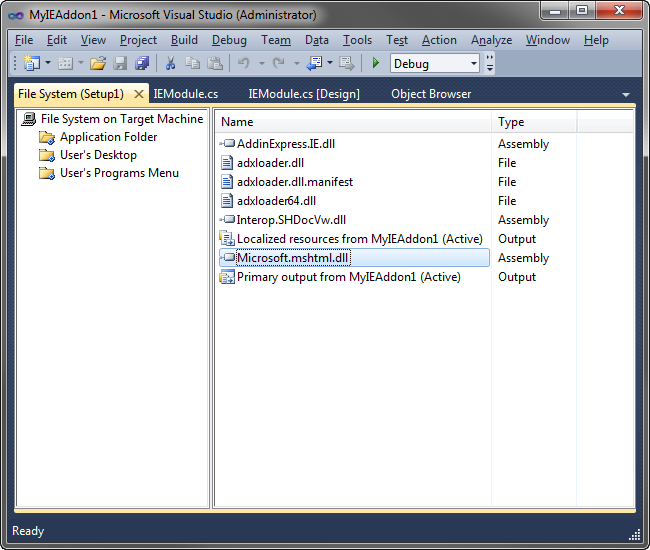
This adds the following entries to the Application Folder of your setup project.
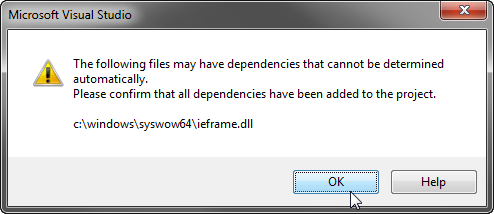
Select AddinExpress.IE.tlb and, in the Properties window, set the Exclude property to True. Also, exclude the ieframe.dll file in the same way. You may get the following dialog, which you can safely ignore:
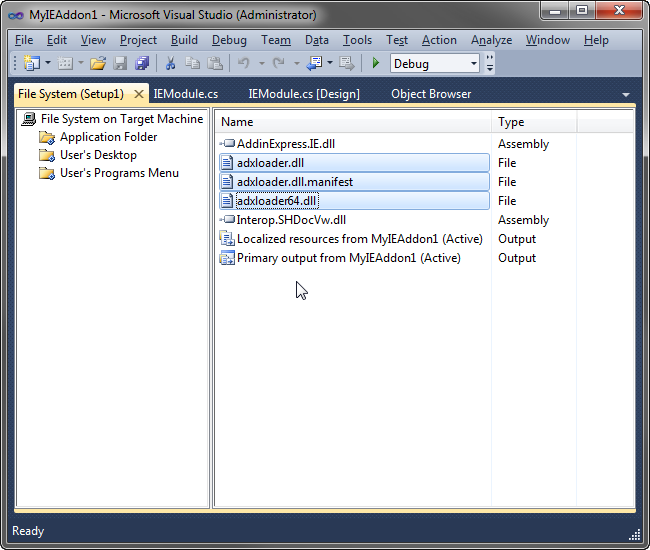
Note. Always exclude all TLB and OLB files from the setup project except for TLBs that you create yourself. Project-dependent resourcesNow you add all resources (e.g. assemblies, DLLs or any resources) required for your IE plug-in project. Add-in Express Loader and its manifestAdd the adxloader.dll, adxloader64.dll and adxloader.dll.manifest files from the Loader subfolder of the add-in project directory to the Application Folder of the setup project.
MSHTML interop assemblyAdd Microsoft.mshtml.dll from the Interop Assemblies folder of the Add-in Express install folder to the Application Folder in the setup project.
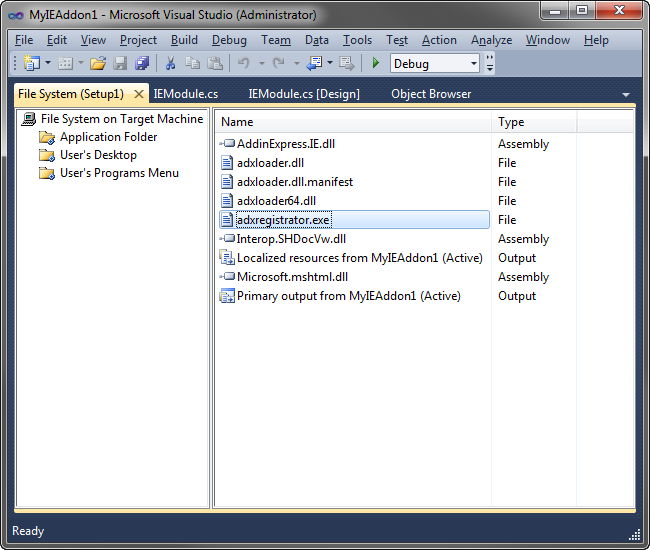
Custom actionsAdd the adxregistrator.exe file from the Redistributables folder of the Add-in Express install folder to Application Folder of the setup project.
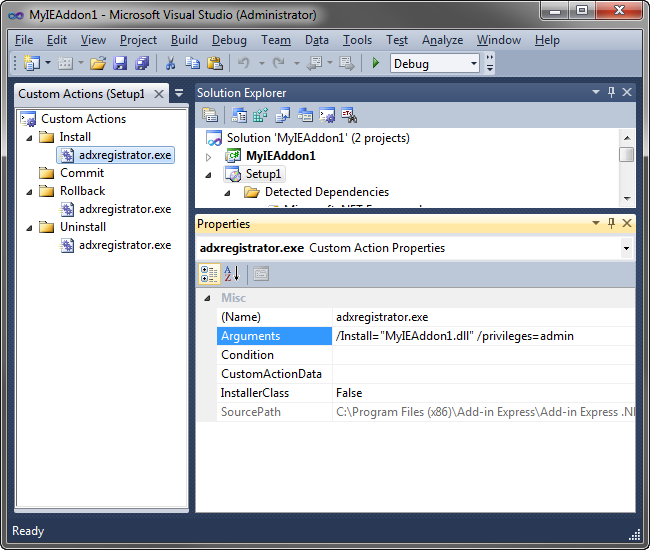
Open the Custom actions editor and add a new action to the Install, Rollback, Uninstall sections. Choose adxregistrator.exe as an item for the custom actions.
Add the following values to the Arguments properties of the following custom actions:
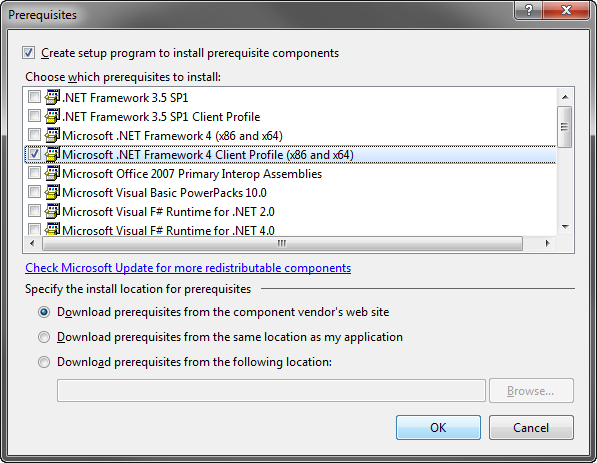
Please replace the "MyIEAddon1.dll" strings above with the file name of your add-on. DependenciesRight click on the Detected Dependencies section of the setup project and choose Refresh Dependencies. Also, exclude all dependencies that are not required for your setup. PostBuildEventSet this property of the setup project as follows: {Add-in Express folder}\Bin\adxpatch.exe" "$(BuiltOuputPath)" /UAC=On PrerequisitesRight click on the setup project and open the Properties dialog. Click on the Prerequisites button and, in the Prerequisites dialog, check all needed prerequisites.
You can choose the ‘Download prerequisites from the same location as my application’ option to distribute all prerequisites with the IE add-on installation package. IE Bar onlyAbsolutely all the steps above are applicable also for an IE bar if it is installed for all users on the PC. But IE Bar is the only IE extension type installable by a standard user. For your IE bar to be installed by a standard user, you need to set the RegisterForAllUsers property of the ADXIEBarModule in your IE bar project to false and change the setup project as follows (pay attention to the text in bold): PostBuildEvent{Add-in Express folder}\Bin\adxpatch.exe" "$(BuiltOuputPath)" /UAC=Off DefaultLocationRight-click the setup project item in the Solution Explorer window, choose View | File System in the context menu, click Application Folder and set the DefaultLocation property as follows: [AppDataFolder][Manufacturer]\[ProductName] Custom actions
Please replace the "MyIEBar1.dll" strings above with the file name of your IE bar. Deploy your IE add-onRebuild the setup project. Copy all setup files to the target PC and run the msi file to install the add-in. However, to install Prerequisites, you will need to run setup.exe. Creating a WiX setup project automaticallyThe below is a minimal introduction to using WiX to deploy an IE extension created with Add-in Express. As you understand, it is not possible to describe all the features provided by WiX. The setup project wizard creates a WiX project containing just one file called Product.wxs. The file is the source of the configuration information (in the XML format) for the WiX binaries mentioned in the References section of the WiX project. The product to be installed is described in the tag Product. The set of important tags describes custom actions which register and unregister your IE extension: And finally, there're tags describing files that will be delivered to the target PC. The minimum set of files includes:
|